

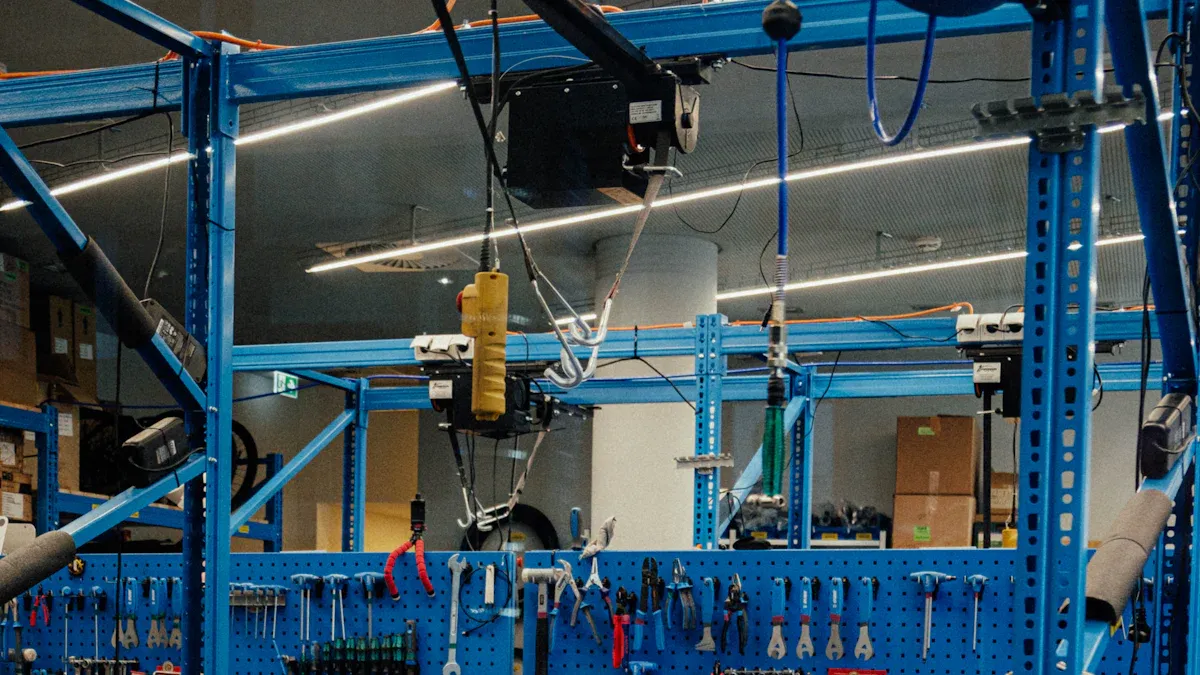
You find seven critical steps inside every carbon mtb rims factory:
Material prep
Layup
Molding
Curing
Finishing
Drilling and lacing
Final QC and shipping
Each step shapes the rim’s strength, weight, and reliability. You see skilled hands and precise machines at work, turning raw carbon fiber into a finished rim ready for the toughest trails.
Key Takeaways
Carbon MTB rims factories use seven main steps. These are material prep, layup, molding, curing, finishing, drilling and lacing, and final quality control with shipping.
Picking the right carbon fiber types and blends is important. It changes the rim’s strength, weight, and ride feel. This makes material prep very important.
Hand layup and fiber orientation affect rim durability and weight. Skilled workers line up fibers to make rims stronger and more reliable.
Molding uses exact metal molds and inside bladders to shape rims. This helps rims have even thickness and fewer weak spots.
Curing uses heat and pressure to harden the resin. This locks in strength. New resins help rims resist damage and can be recycled.
Finishing trims and sands rims to get the right shape and a smooth surface. Careful checks help find defects early.
Drilling and lacing get rims ready for spokes with care. Eyelets or molded holes stop cracks and keep wheels strong.
Final quality control uses tests and digital tracking. This makes sure each rim is safe, strong, and ready to use.
1. Material Prep

Carbon Fiber Selection
Every carbon mtb rims factory starts by picking the right carbon fiber. The type and quality of carbon fiber matter a lot. They decide how strong, light, and smooth the rim will be. Top carbon rims manufacturers like Amoy Wheels set strict rules for buying carbon fiber. They only buy from certified suppliers. Each batch gets checked to make sure it is pure and the same as the last.
Tip: Picking the best carbon fiber blend helps the rim last longer. If you use the wrong blend, the rim might break when riding.
Factories use different kinds of carbon fiber to make rims. Each kind has special features that change how the rim works and lasts. Here is a table that shows the most common types:
Amoy Wheels, a carbon rims manufacturer, mixes different fibers to get the right balance. T700 makes the rim tough for rough trails. T800 adds stiffness so you can pedal harder. The quality of the fiber changes the rim’s weight, how long it lasts, and how it feels to ride.
Cutting and Storage
After picking the carbon fiber, it must be cut into shapes. Skilled workers use special machines to cut the fiber sheets. They follow exact patterns for each piece. This makes sure every layer fits just right in the next step. Amoy Wheels and other top carbon rims manufacturers use clear instructions to cut down on waste and keep things the same.
Note: Cutting the fiber well saves money and helps the planet by making less trash.
Once the fiber is cut, it needs to be stored safely. The storage area must be clean and have the right temperature. If the fiber gets wet or dirty, it can ruin the rim. Leading factories like Amoy Wheels use sealed rooms and keep track of all the fiber. This careful work makes sure every rim starts with the best material.
Many new carbon rims manufacturers also try to make less waste. Some use special thermoplastic carbon fiber that can be recycled. Others use smart designs and molds to use less material.
By following these careful steps, a carbon mtb rims factory makes sure their rims are strong, light, and ready for tough rides.
2. Layup
Hand Layup
You step into the layup room of a carbon mtb rims factory and see skilled workers at their stations. Each worker handles sheets of carbon fiber with care. You watch them place each layer into the rim mold by hand. This process is called hand layup. You notice that every piece must fit perfectly. Workers follow strict patterns to make sure the fibers line up in the right direction.
Tip: The way you orient the fibers changes how strong and light the rim will be.
A carbon rims manufacturer knows that carbon fiber is strongest along its length. You must align fibers along the main load paths to make the rim tough and stiff. If you use layers in different directions, you boost fatigue resistance and reliability. You avoid weak spots and make the rim last longer. If you get the orientation wrong, the rim can fail early or feel heavy.
Key points about fiber orientation:
Align fibers with the direction of force for maximum strength.
Use layers in several directions for better durability.
Smart orientation lets you use less material and keep the rim light.
Advanced methods like filament winding give even more control, but hand layup allows custom designs for special needs.
Hand layup takes time and skill. You rely on experienced workers to avoid mistakes. If a worker uses too much resin or pulls the fiber too tight, the rim can end up heavier or weaker. Automated layup, like filament winding, wraps fibers under constant tension and uses less resin. You get rims that are stiffer, lighter, and more consistent. Hand-laid rims can be heavier and cost more to make, but they allow for custom shapes and special features.
Prepreg and Resin
You see workers using prepreg carbon fiber in the layup process. Prepreg means the fiber already has resin in it. You get better control over how much resin goes into each layer. This control helps you make rims that are lighter, stiffer, and stronger.
A carbon rims manufacturer stores prepreg at low temperatures to keep the resin fresh. You must work quickly and carefully to avoid defects. After layup, you cure the rim in an oven. The resin hardens and binds the fibers together. Epoxy resin is common because it sticks well to carbon and does not shrink much. You get rims with high strength and few defects.
Note: Using prepreg and the right resin system helps you avoid voids and weak spots. You make rims that last longer and perform better on tough trails.
You see that the layup step is where you set the rim’s strength, weight, and reliability. You must pay attention to every detail. The choices you make here decide how the rim will handle the demands of mountain biking.
3. Molding
Rim Mold
You now move to the molding area in the carbon mtb rims factory. Here, you see the heart of the rim-shaping process. A carbon rims manufacturer uses precision-engineered metal molds to give each rim its exact shape and size. These molds must be perfectly clean and smooth. Any dust or leftover resin can cause defects in the finished rim.
Before you start, you check the mold for damage. You apply a special release agent to the mold’s surface. This step helps you remove the rim easily after curing. You then place the carefully layered carbon fiber layup into the mold. You must align every layer with the mold’s contours. This step ensures the rim will have the right thickness and strength in every spot.
Tip: Always inspect the mold before use. Even a small scratch can weaken the rim or leave marks on the surface.
A carbon rims manufacturer often uses different molds for different rim sizes and profiles. You might see molds for wide trail rims, narrow cross-country rims, or even custom shapes for pro riders. The mold’s design controls the rim’s width, depth, and spoke hole angles. You get consistency and accuracy with every rim you produce.
Internal Bladder
Once you finish placing the layup, you add an internal bladder. This bladder looks like a soft, inflatable tube. You position it inside the carbon layup, right in the center of the mold. When you close the mold, you inflate the bladder with air or water.
The bladder pushes the carbon fiber layers tightly against the mold walls. This pressure removes air pockets and makes the rim hollow and strong. You get a smooth inner surface and even wall thickness. The bladder also helps you use less resin, which keeps the rim light.
Steps for using an internal bladder:
Insert the bladder into the layup.
Seal the mold tightly.
Inflate the bladder to the correct pressure.
Check for leaks or misalignment.
A carbon rims manufacturer may use different bladder materials, such as silicone or nylon. Some factories use single-use bladders, while others use reusable ones to save costs and reduce waste.
Note: The internal bladder is key for making a strong, lightweight, and reliable rim. If you skip this step or do it wrong, the rim may have weak spots or extra weight.
By following these molding steps, you help the carbon mtb rims factory create rims that meet strict quality standards. You set the stage for the next step: curing the rim to lock in its shape and strength.
4. Curing
Oven or Autoclave
You walk into the curing room at a carbon mtb rims factory. You see rim molds inside big ovens or autoclaves. A carbon rims manufacturer uses exact heat and pressure to make the resin hard and stick the carbon fibers together. You set the oven or autoclave to the right temperature for the resin. Most places use heat between 120°C and 180°C. You watch the pressure so the resin spreads and fills every space.
Curing steps you follow:
Put the rim mold in the oven or autoclave.
Set the heat and pressure for the resin.
Keep these settings for a few hours.
Check sensors to make sure the heat is even.
You see that top carbon rims manufacturers use autoclaves for their best rims. Autoclaves add more pressure, which pushes out air bubbles and stops empty spots. This makes rims stronger and last longer. Some makers use ovens for regular rims. Ovens work well but may not make rims as strong as autoclaves.
Tip: Keeping heat and pressure the same during curing stops weak spots and helps the rim pass tough tests.
New resin types have changed how curing works. Thermoplastic composites, like FusionFiber® technology, use long-chain polymers and nylon instead of old epoxy resins. These new resins give many benefits:
More bend and better damage resistance.
Can take hits, so the rim does not break easily.
Can be recycled and reused, which helps the planet.
Last longer and fight water and heat better.
A carbon rims manufacturer changes curing steps for thermoplastic resins. You use different heat and sometimes less time. You also change molding ways, like Resin Transfer Molding (RTM) and bladder molding, to use more fiber and fewer empty spots.
Cooling and Demold
After curing, you let the rim mold cool slowly. Cooling too fast can crack or bend the rim. You watch the temperature and wait until the rim is cool. When it is ready, you open the mold and take out the rim. You let out the air and pull out the bladder, leaving a smooth, hollow rim.
New ideas have made this step better. You now use one piece for layup, not three, so there are no overlap spots or weak places. You also take out the pre-cured carbon base ring, which makes the rim lighter and stronger. The way you remove the air bladder has changed. You now use a small round hole, which is also a spoke hole. This saves material and keeps the rim strong.
Technological improvements you see:
One-piece layup for lighter, tougher rims.
Small round holes for bladder removal, making rims stronger.
Better inside uniformity for more lasting rims.
Improved spoke tension tests show rims can take more force.
You finish curing with a rim that is tough, light, and ready for the next step. The choices you make during curing, like picking resin and cooling slowly, change how the rim works and lasts. You see how new resins and better ways help a carbon rims manufacturer make great rims for riders.
5. Finishing
After curing, you go to the finishing step in a carbon mtb rims factory. This step turns a rough rim into one that looks good and works well on trails. You do two main jobs here: trimming and sanding with inspection.
Trimming
First, you trim off extra material left from molding. A carbon rims manufacturer uses special tools to cut away extra resin or fiber on the rim’s edges. You make sure the rim has the right shape and size for mountain biking. If you leave too much, the rim gets heavy and may not fit tires or spokes. If you cut off too much, the rim can get weak.
Steps in trimming:
Hold the rim safely in place.
Use sharp cutters to take off extra bits.
Check the rim’s shape with factory rules.
Tip: Trim carefully so you do not leave sharp edges. Sharp edges can hurt tires or cause injuries when putting the rim together.
Every carbon rims manufacturer pays close attention to trimming. Even small mistakes can change how the rim works or make it unsafe.
Sanding and Inspection
After trimming, you start sanding the rim. You use fine sandpaper to smooth the rim’s surface. This step takes off leftover resin and rough spots, especially near spoke holes. You want the rim to be smooth before adding any coating. Sanding also gets the rim ready for checks.
You check each rim for problems. You look for bumps, dirt, or uneven layers. You weigh the rim and check if it is round. You test if it is stiff and straight. You make sure the rim is safe and works well.
Quality control checks include:
Testing the rim with high pressure for safety.
Checking if the rim can handle many rides and hits.
Measuring if the rim is round and holds air well.
Testing if the rim can take hard impacts and strong spokes.
Checking if the rim is stiff up and down and side to side.
Making sure the rim fits with different wheels.
Note: Careful checks at this step help you find problems before painting or coating the rim.
You pick the finish for each rim. Matte finishes look flat and are liked by many riders. Glossy finishes are shiny and bright. You put on thin clear coats to protect the carbon fiber and make it look better. Some carbon rims manufacturers offer rims with no paint for custom looks. Others sand and paint rims after making them.
Finishing is not just about looks. It keeps the rim safe and smooth. You need skilled workers and strong checks to make rims that work well for mountain biking.
6. Drilling and Lacing
Spoke Holes
You reach the drilling stage in the carbon mtb rims factory. Here, you prepare the rim for spokes and the valve. Precision matters. You use specialized machines to drill each hole at the correct angle and position. This step ensures the rim will fit the hub and spokes perfectly.
To prevent cracks and boost durability, you follow industry best practices:
You add eyelets or sockets to spread the load around each spoke hole. This reduces stress and helps the rim last longer.
Double eyeletted rims offer even more strength and durability than single eyeletted or non-eyeletted rims.
Eyelets prevent galling and distribute force, lowering the risk of cracks.
Ferrules also help by spreading force over a wider area, making rims less likely to develop stress cracks.
Some carbon rims manufacturers, like ENVE, mold spoke holes and recesses into the rim during manufacturing. This method keeps the carbon fibers intact and avoids cutting them, which improves strength and durability.
Tip: Using molded spoke holes instead of drilling after curing helps you maintain rim strength and avoid weak spots.
You also drill a hole for the valve. You check every hole for smoothness and correct size. Any mistake here can lead to problems during wheel assembly or riding.
Lacing and Truing
After drilling, you move to lacing and truing. This process turns the rim into a complete wheel. You start by arranging the spokes in a pattern, such as 3-cross or radial, to match the hub and rim design. Each pattern affects the wheel’s strength and performance.
Follow these steps for lacing and truing:
Insert spokes through the hub and rim, following the chosen pattern.
Hand-tighten each spoke to hold the structure together.
Use a spoke tension meter to measure and adjust tension. Even tension prevents wobbling and keeps the wheel strong.
Place the wheel in a truing stand. Spin the wheel and look for side-to-side (lateral) or up-and-down (radial) wobbles.
Tighten or loosen spokes in small steps to correct any deviations. Focus on high spots first, then low spots.
Check spoke tension regularly to avoid new wobbles while making adjustments.
Finish by de-stressing the wheel and verifying that all deviations are within tight tolerances—usually less than 1mm.
Note: Proper lacing and truing ensure your wheel stays round and aligned. This is critical for performance and durability, especially on rough trails.
A skilled carbon rims manufacturer pays close attention to every detail in this step. You get a wheel that spins smoothly, handles impacts, and lasts for many rides.
7. Final QC and Shipping
Quality Control in a Carbon MTB Rims Factory
You are now at the last step in the carbon mtb rims factory. This is where the most important checks happen before a rim leaves. Every rim goes through strict quality control. You want to make sure each rim is strong, light, and safe.
You use a checklist to check every rim:
Look at the rim for cracks, bubbles, or bad spots.
Measure if the rim is round and the right width.
Test how strong the rim is with special machines.
Use CT scans to find hidden problems inside the rim.
Weigh the rim after sanding. If it is too heavy or light, you do not use it.
Run a 100km test on a machine to see if it lasts.
Record spoke tension for both sides using a computer.
Give each rim its own ID number so you can track it.
Tip: You keep all test results in a computer system. This helps you know which batch, supplier, and worker made each rim.
You also follow world rules like ISO 9001:2015 and EN ISO 4210-7:2014. You check your testing tools every few months in a special lab. You write down everything, like material papers and spoke tension numbers. This proves your rims are good quality.
Here is a table that shows the main quality control steps:
You make sure every rim that passes these tests is safe, strong, and ready for riding.
Packaging
After quality control, you get the rims ready to ship. You want to stop scratches, dents, or cracks while moving the rims. You follow careful steps to pack each rim:
Put each rim in a wheel bag to cover it.
Add foam, bubble wrap, or cardboard to the sides, especially near the axle.
Place foam or felt end caps on the axle ends.
Wrap any loose axles in bubble wrap and tie them to the wheel.
Cover the cassette area with plastic or cardboard.
Add more padding around the disc brake rotors.
Put the wrapped rims in a strong box and use tape or zip ties so nothing moves.
You can wrap the whole box in plastic for extra safety.
You might use EPE foam films and paperboard for more protection. You close the box with tape and mark it as fragile. Some companies use double-wall boxes with extra supports inside for more safety. This keeps the rims safe, even if the box gets bumped.
Note: Packing carefully means your rim will arrive with no damage and be ready to use.
You finish by putting a label on the box and getting shipping papers ready. You track each rim by its ID number. This way, you can always know where the rim came from if you need to.
You can see that every step in the carbon mtb rims factory is important for making strong, light, and reliable rims. Careful material prep and skilled layup help the rim work well every time. Molding and curing with care stop problems and make the rim last longer. Finishing, drilling, and lacing are done with care so the rim is safe and rides smoothly. The last checks and good packaging keep your rim safe until you use it.
Testers have shown that good quality control and skilled workers make rims that can handle hard trails and big hits. Makers give lifetime warranties, do lots of tests, and help you if you have problems. Knowing how rims are made helps you pick the right ones with trust.
FAQ
What makes a carbon rims manufacturer different from other wheel makers?
A carbon rims manufacturer uses special carbon fiber and unique steps. Their rims are lighter and stronger than aluminum ones. These factories care about quality and new ideas.
How do you know if a carbon rim passes quality control?
You look for cracks, check the weight, and see if it is round. Machines and people check spoke tension and other details. Each rim gets its own ID and test results before it ships.
Why do carbon rims cost more than aluminum rims?
Carbon rims cost more because they use better materials and skilled workers. The process takes longer and needs more technology. You get rims that last longer and work better.
Can you repair a damaged carbon rim?
You can fix small chips or scratches on a carbon rim. If there is a big crack or deep damage, ask the carbon rims manufacturer. They will check and tell you if it can be fixed or needs to be replaced.
How long does it take for a carbon rims manufacturer to make a rim?
It usually takes one or two weeks to make a rim. The steps include material prep, layup, molding, curing, finishing, and testing. Custom rims may take more time.
What should you look for when choosing a carbon rims manufacturer?
Look for certifications, good quality checks, and customer reviews. A good carbon rims manufacturer shares test results, gives warranties, and answers your questions.
Do carbon rims work with all types of mountain bikes?
Most carbon rims fit regular mountain bike sizes. Check the rim width, diameter, and spoke count. Ask your carbon rims manufacturer if the rim fits your bike.
Are carbon rims safe for aggressive trail riding?
Yes, a carbon rims manufacturer makes rims for hard trails. The rims are tested for impacts, spoke tension, and strength. Always follow the maker’s rules for safe riding.